How to issue Open Badges people can trust
What it takes to issue Open Badge 3.0 credentials that verify cleanly — clear criteria, a compliant data model, stable issuer infrastructure and a tested revocation plan.
OPEN BADGE VALIDATOR · Oct 19, 2026

Issuing a trustworthy Open Badge starts long before the artwork: clear criteria, a compliant Open Badges 3.0 data model and an issuer profile that stays reachable for verification. Before announcing a program, run a representative credential through an independent Open Badge validator to confirm it verifies the way your recipients will experience it.
That is the summary. The rest of this guide unpacks it: the six stages every credible badge program goes through, the technical decisions that matter (and the ones that don't), and the checklist to clear before the first real badge leaves your hands. If you are still fuzzy on what an Open Badge actually is under the hood, read What is an Open Badge? first — this article assumes the basics.
Trust is designed, not declared
Here is the uncomfortable truth about digital credentials: nobody has to believe you. The Open Badges ecosystem is deliberately decentralized — there is no central authority that blesses issuers, which means your badges earn trust the only way available: by verifying cleanly, every time, for anyone, indefinitely.
That reframes what "issuing" means. You are not producing images; you are making a public, signed, machine-checkable promise — and standing up the infrastructure that lets strangers test that promise without asking you first. Every decision below follows from that one idea.
The issuing lifecycle
Teams that treat badge issuing as a one-time export inevitably end up with broken credentials a year later. Teams that treat it as a lifecycle don't.
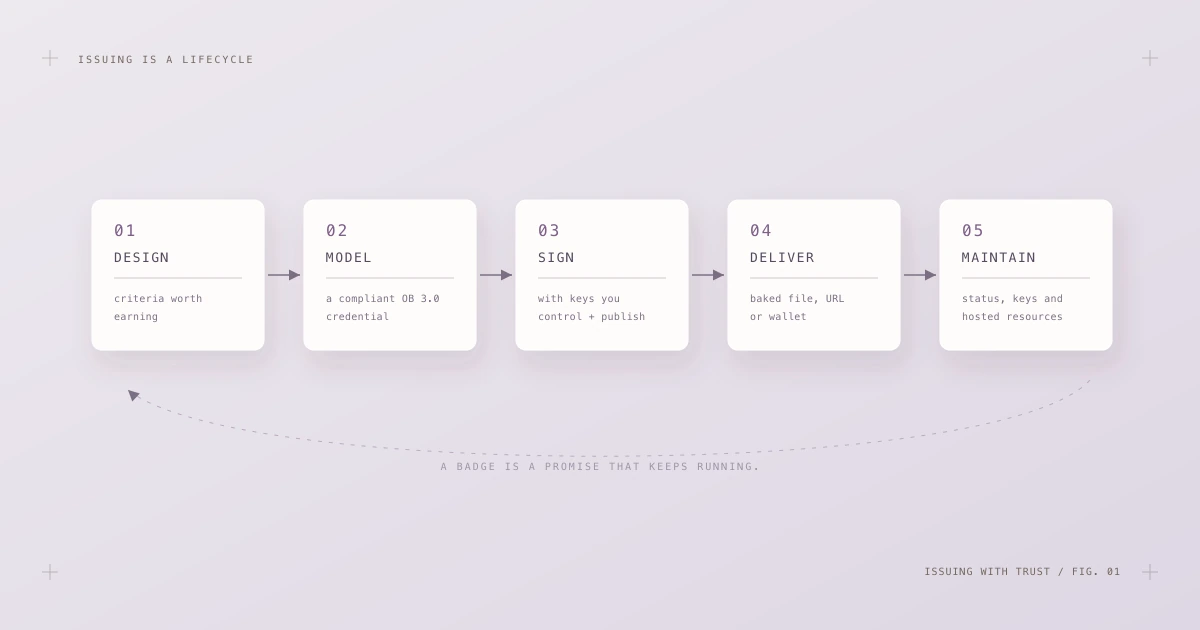
Fig. 1 — Design, model, sign, deliver, maintain. The loop back is the part most programs forget.
Five stages, in order: design an achievement worth earning, model it as a compliant credential, sign it with keys you control, deliver it in forms recipients can actually use, and maintain everything the credential depends on for as long as it lives. Let's take them in turn.
Step 1: Design an achievement worth earning
Verification can prove a badge is authentic. It cannot make the badge mean anything — that part is designed. The difference between a credential and a participation sticker lives in two fields: criteria and evidence.
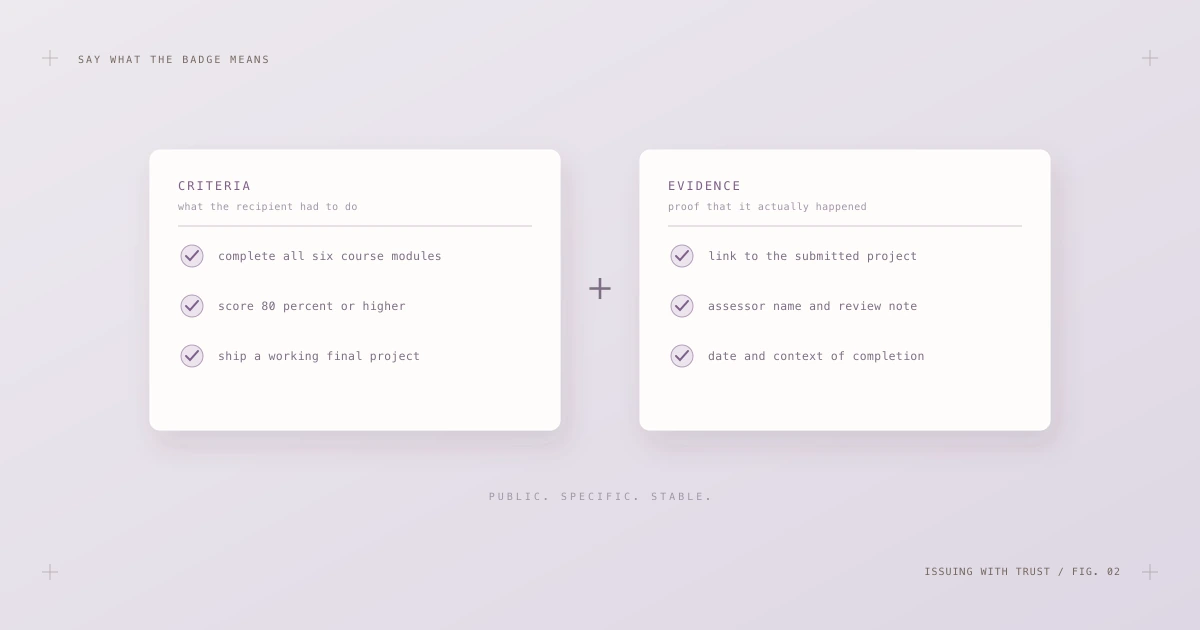
Fig. 2 — Criteria say what it took; evidence shows it happened. Together they are the badge's actual content.
Criteria describe what the recipient had to do. Write them for a stranger — a recruiter who has never heard of your program — and make them specific and falsifiable:
- Weak: "Demonstrated knowledge of data analysis."
- Strong: "Completed all six course modules, scored 80% or higher on the proctored assessment, and shipped a working final project reviewed by an instructor."
Evidence links to proof that it happened for this recipient: the project, the assessed submission, the review note. Evidence is optional in the spec and transformative in practice — it converts your badge from an assertion into a pointer at verifiable work.
In credential form, the two look like this:
"achievement": {
  "name": "Data Analysis Fundamentals",
  "criteria": {
    "narrative": "Complete all six modules, score 80% or higher on the assessment, and ship a reviewed final project."
  }
},
"evidence": [{
  "type": ["Evidence"],
  "id": "https://portfolio.example.com/ana/project",
  "name": "Final project",
  "description": "Reviewed and approved by the course instructor."
}]
Two design rules pay for themselves many times over. First, publish the criteria at a stable public URL and keep it unchanged for the life of the badge — silently redefining what a badge means retroactively devalues every copy already issued. Second, issue fewer, better badges. A program with three rigorous badges builds more trust than one with thirty trivial ones; verifiers learn surprisingly quickly which issuers dilute their own currency.
Step 2: Model the credential correctly
Open Badges 3.0 credentials are W3C Verifiable Credentials with a specific profile defined by 1EdTech. The structural essentials:
- The correct
@contextentries (the W3C credentials context plus the 1EdTech OB 3.0 context) andtypevalues (VerifiableCredential,OpenBadgeCredential). - A
credentialSubjectcontaining anAchievementwith name, description and criteria. - An
issuerprofile with a stableidURL. - A
validFromdate — and avalidUntilif the achievement genuinely expires. Expiry is a feature: a first-aid badge that never expires is less credible, not more. - A
credentialStatusentry pointing at your revocation mechanism (more below).
You do not need to memorize the schema; you need to validate against it. Build one representative credential and run it through the validator before writing another line of issuing code. The structural check will catch misspelled fields, missing contexts and malformed shapes in seconds — the full set of checks is documented here.
Step 3: Your issuer profile is infrastructure
Every badge you issue points back at an issuer profile: a JSON document at a URL, declaring who you are and — critically — publishing the public keys verifiers use to check your signatures.
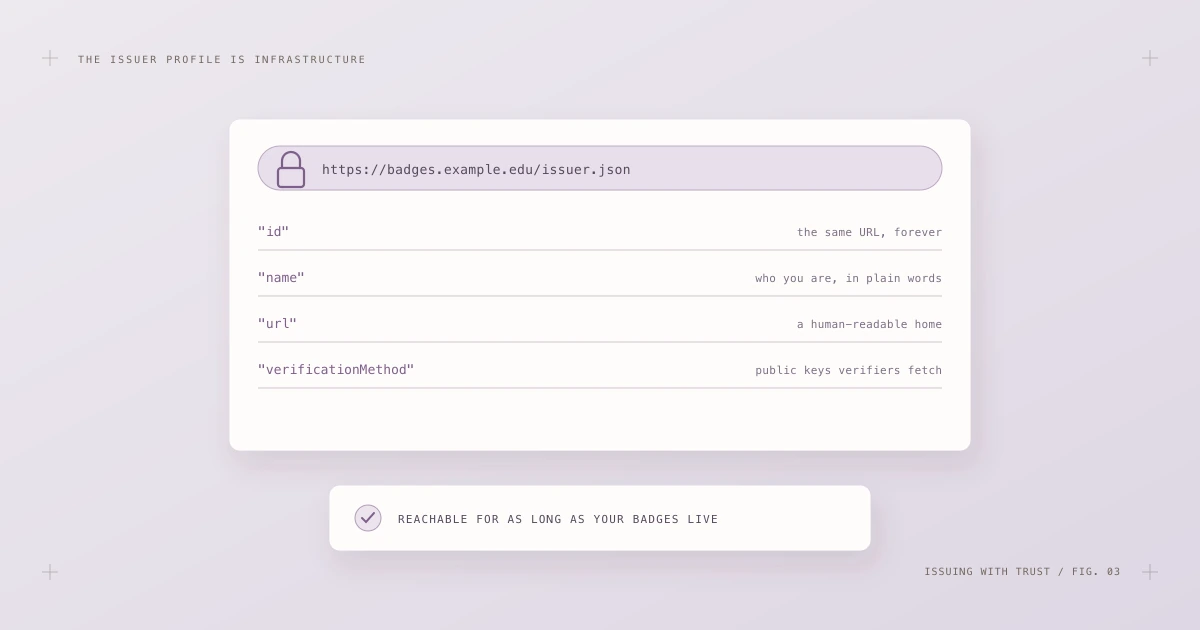
Fig. 3 — The issuer profile is the root of trust for every badge you ever issue. It has to outlive all of them.
Treat that URL like production infrastructure, because it is:
- Put it on a domain you control and intend to keep. Not an intern's side project, not a free subdomain, not a URL with a platform's name in it unless you plan to stay. Every badge you ever issue will embed this address permanently.
- The
idmust never change. The issueridis your identity in the ecosystem. Renaming domains later orphans every previously issued credential. - Keys deserve ceremony. The private key signs your institutional word. Store it like a secret (HSM or managed KMS, not a laptop), restrict who can trigger signing, and plan key rotation: new keys get added to the profile, old ones remain published so historical badges still verify.
- Monitor reachability. If the profile or key URLs go down, every badge you have issued becomes unverifiable at once — from the outside, indistinguishable from fraud. Uptime monitoring on these endpoints is cheap; reputational recovery is not.
Step 4: Choose how you'll sign
The 3.0 specification gives you two mechanically different, equally valid ways to attach proof:
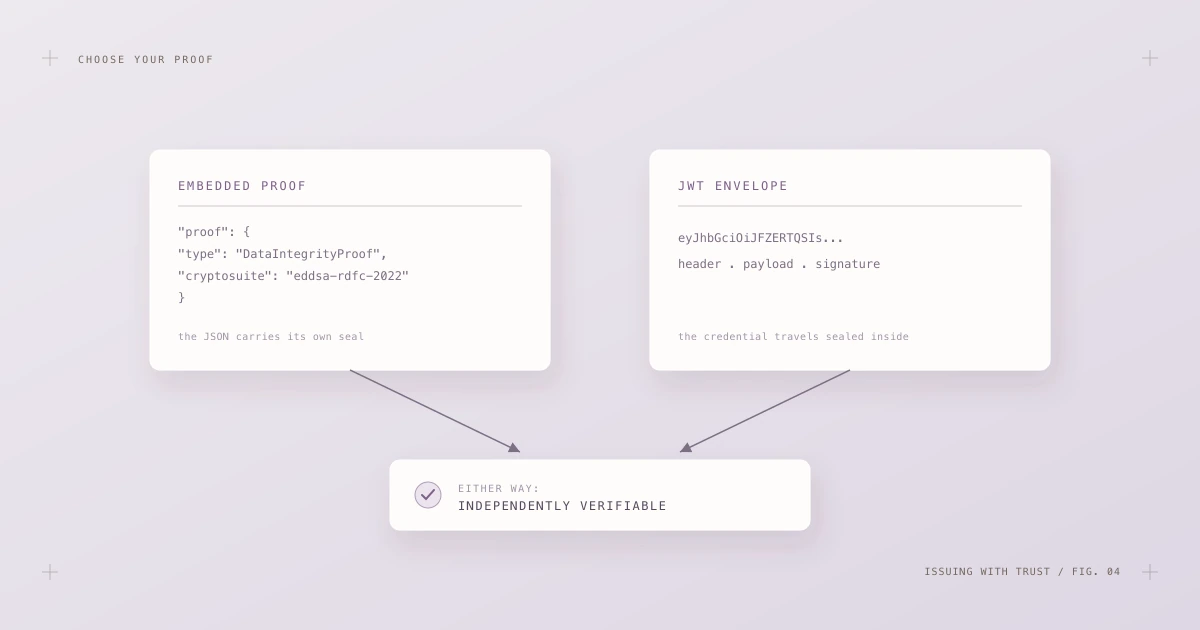
Fig. 4 — Embedded proof or JWT envelope: different packaging, same guarantee. Pick one and be consistent.
- Embedded proof — a
proofblock (typicallyDataIntegrityProofwith theeddsa-rdfc-2022cryptosuite) inside the JSON document itself. The credential remains human-readable JSON with its seal attached. - JWT envelope — the credential is wrapped and signed as a compact JWS (
header.payload.signature). Common where tooling already speaks JWT.
Verifiers handle both; a good validator accepts either without you thinking about it. What matters is not which you choose but what you never do: issue unsigned credentials. An Open Badge without a proof is a formatted claim, not a credential — it will (correctly) fail every proof check for the rest of its existence.
Step 5: Deliver the badge
A credential nobody can find, share or import is a credential that may as well not exist. Deliver every badge in all three forms recipients actually use:
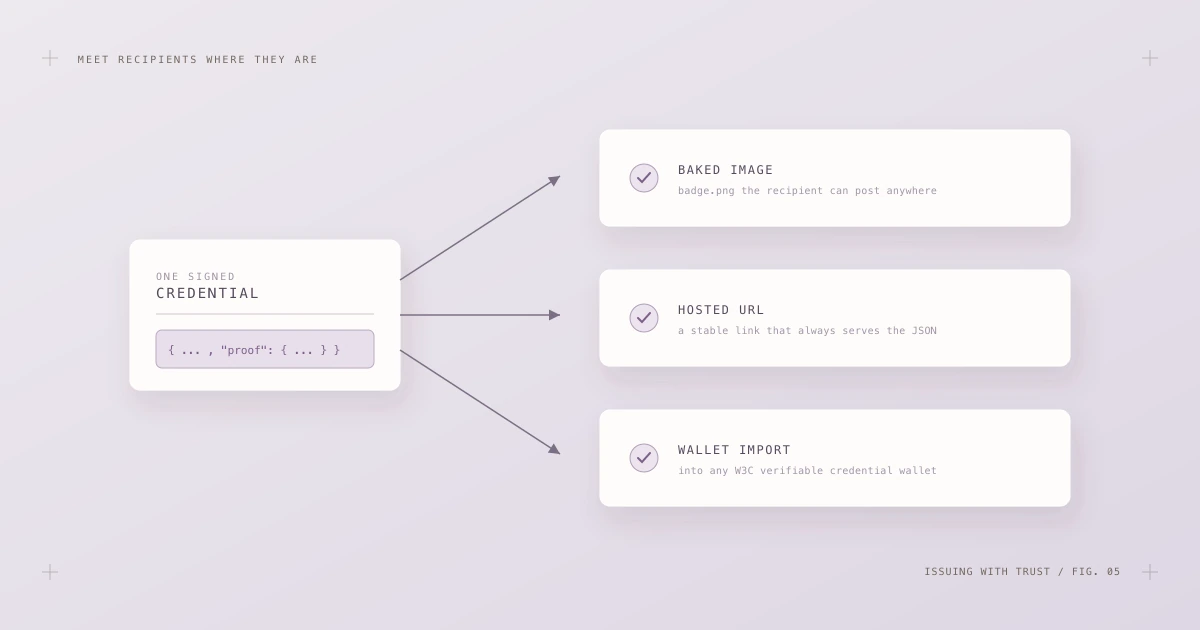
Fig. 5 — One credential, three doors: a file to keep, a link to share, a wallet to import into.
- A baked image — the badge artwork with the full signed credential embedded in the file. This is the recipient's permanent, offline-safe copy: it verifies even if your platform disappears. Tell recipients explicitly to keep the original file and that re-uploads through compressing platforms strip the credential.
- A hosted URL — a stable public link serving the credential JSON. This is what gets pasted into CVs and LinkedIn, and what reviewers will feed into a validator. Like the issuer profile, these URLs are forever: no link rot, no auth walls, no "page not found" two years later.
- Wallet compatibility — because 3.0 badges are standard Verifiable Credentials, they can be imported into VC wallets. You rarely need to build anything extra here; you just need to not break the standard.
Alongside the artifacts, send recipients two sentences of education: "This badge is a verifiable credential — anyone can check it at an independent validator. Keep the original file; share the link." Recipients who understand what they hold become your program's best distribution channel.
Step 6: Plan for revocation before you need it
The least glamorous stage is the one that separates professional programs from hobby projects. Things will happen after issuing: a certification cycle ends, a badge is granted in error, in rare cases one must be withdrawn for cause. The standard handles all of this through credential status — typically a hosted status list in which each credential owns one bit, flipped if revoked. Verifiers check it live on every verification.
Your obligations as an issuer are concrete:
- Include a
credentialStatusentry in every badge from day one — you cannot retrofit status onto already-issued credentials. - Keep the status list hosted, reachable and backed up, with the same seriousness as the issuer profile.
- Write down the revocation policy — who decides, on what grounds, how recipients are informed — before the first contentious case, not during it.
- Re-validate a sample of live badges on a schedule. Keys expire, certificates lapse, URLs move; you want to find the breakage before your recipients' employers do. The habits are covered in depth in Managing an Open Badge program at scale.
Build it yourself or use a platform?
Everything above is achievable with open tooling and engineering time: generate keys, host profiles, write signing code, bake images, run status infrastructure. For a technical team issuing at small scale, it is a reasonable weekend-plus project and a genuinely good way to learn the standard.
Most organizations, though, are not in the credential-infrastructure business. Dedicated platforms such as Certifier exist precisely for this: they handle the data model, signing, key management, hosting, baking, delivery emails and recipient experience, so your team designs the achievement and the platform guarantees the plumbing. The healthy way to choose is to ignore the demo gloss and test the output: issue a sample badge and run it through an independent validator. A platform whose credentials pass structure, proof and status checks on neutral tooling is doing its job; one whose badges only "verify" on its own website is selling you a walled garden with extra steps.
Whichever route you take, the responsibility that cannot be outsourced is meaning: your criteria, your assessment rigor, your decisions about who earns what. Platforms make badges verifiable. Only you can make them worth verifying.
The pre-launch checklist
Before the announcement email goes out, a trustworthy program can tick every box on this list:
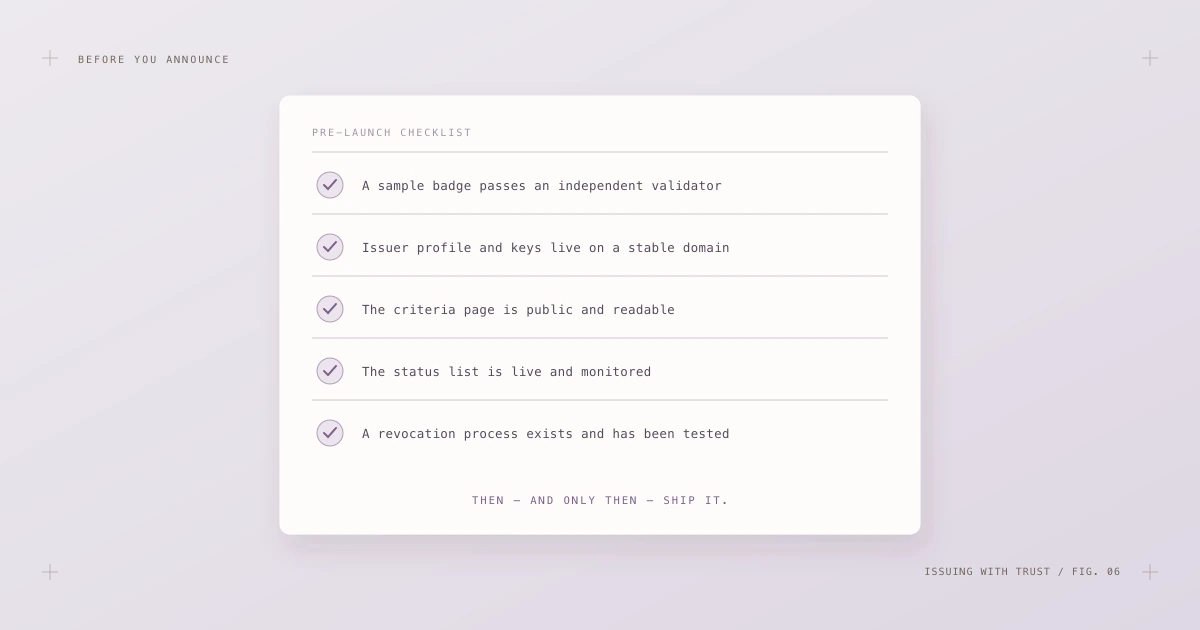
Fig. 6 — Five boxes. If any of them is unticked, the launch is not ready — it is merely scheduled.
- A sample badge passes an independent validator — structure, proof and status, all green, on a tool you don't operate.
- The issuer profile and keys live on a stable domain you control, with monitoring on the endpoints.
- The criteria page is public, specific and readable by someone who has never heard of you.
- The status list is live and referenced by every credential you issue.
- The revocation process exists on paper and has been tested — including one deliberately revoked test badge that correctly fails verification afterwards.
Run the test the way a stranger would: take the baked file from the recipient email, feed it to the validator, read the whole report. Then revoke the test badge and run it again — watching your own credential fail the status check is oddly satisfying, and it proves the full lifecycle works.
The badge is a promise that keeps running
Issuing Open Badges people can trust is not a technical trick — it is the discipline of making a public promise and keeping the machinery of that promise alive: criteria that mean something, a data model that validates, keys that stay safe, URLs that stay up, and a revocation path that works when needed.
Do that, and something quietly powerful happens: your badges stop needing you. Each one travels with its recipient — through job applications, portfolio sites and wallets — proving itself to strangers, on neutral ground, for years. That is what trust looks like in a decentralized ecosystem, and it is entirely within reach of any issuer willing to treat the promise as seriously as the artwork.